- support@clearvisiontech.com
- (909) 484-2052


You can schedule an import to run automatically. This can be very convenient and a big time saver.
To schedule a import, click the Import Data button and choose Scheduled Imports.
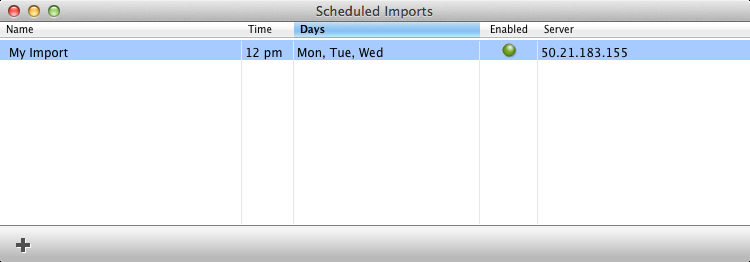
Create a New Scheduled Import
To create a scheduled import, click the  New Scheduled Import button at the bottom-left of the screen. A new scheduled import will be created. Next, you'll need to define the settings for the three areas; Schedule, Server and Options.
Schedule Panel
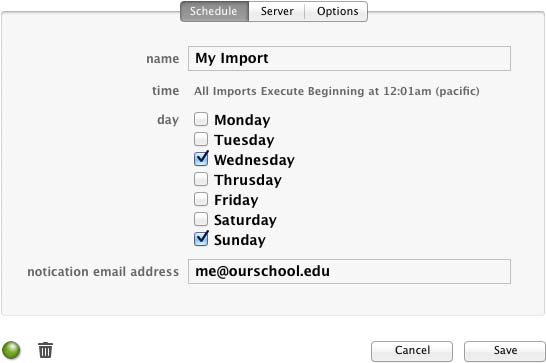
Name - Enter the name of this scheduled import. Enter a name that describes the import so you'll recognize it later.
Time - All scheduled imports begin at 12:01 am (pacific time). Note that all scheduled imports are cued and will be processed in order. Therefore, it's possible that your import will be processed after 12:01am.
Day - Select the day(s) of the week you want RCM to run your import.
Notification eMail Address - When RCM finishes the import, or if an error is encountered, RCM will send an eMail containing the outcome of the import. Use this area to supply the eMail address RCM should use.
Server Panel
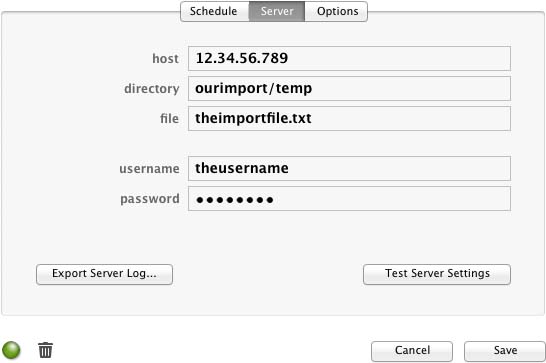
Host - Enter IP Address to your server.
Directory - The directory containing the import file on your server.
File - The name of the import file on your server.
User Name - The Username to login to your FTP server.
Password - The Password to login to your FTP server.
Export Server Log - Click this button to save a log of all the scheduled imports that have taken place as well as the outcome of the import.
Test Server Settings - Click this button to verify that RCM can connect to your FTP server and locate the file. Note that the file must be in the directory for the test to be successful.
Options Panel
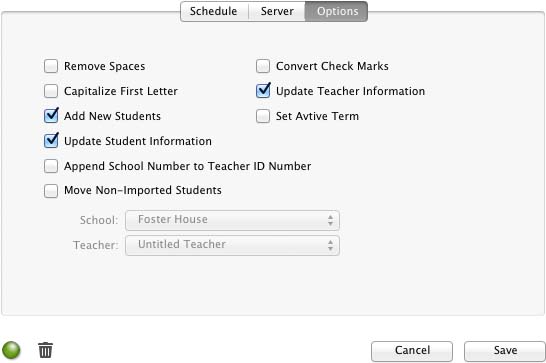
All of these options are the same as the settings described in the Import Data Window. See The Import Data Window.
Disabling a Scheduled Import
To disable a scheduled import, click the  Disable Scheduled Import button at the bottom-right corner of the screen. Once the scheduled import is disabled, it will not execute. If the Disable Scheduled Import button is green, the import is enabled. If the Disable Scheduled Import button is
  red, the import is disabled.
Deleting a Scheduled Import
To delete a scheduled import, click the  Delete Scheduled Import button at the bottom-right corner of the screen. Once the scheduled import is deleted, it cannot be recovered and it will no longer run.