- support@clearvisiontech.com
- (909) 484-2052


 Attendance
RCM's Attendance feature allows teachers to easily take daily attendance in RCM.
There is complete functionality to setup, and manage the attendance in SIMON.
With RCM's Attendance feature you can:
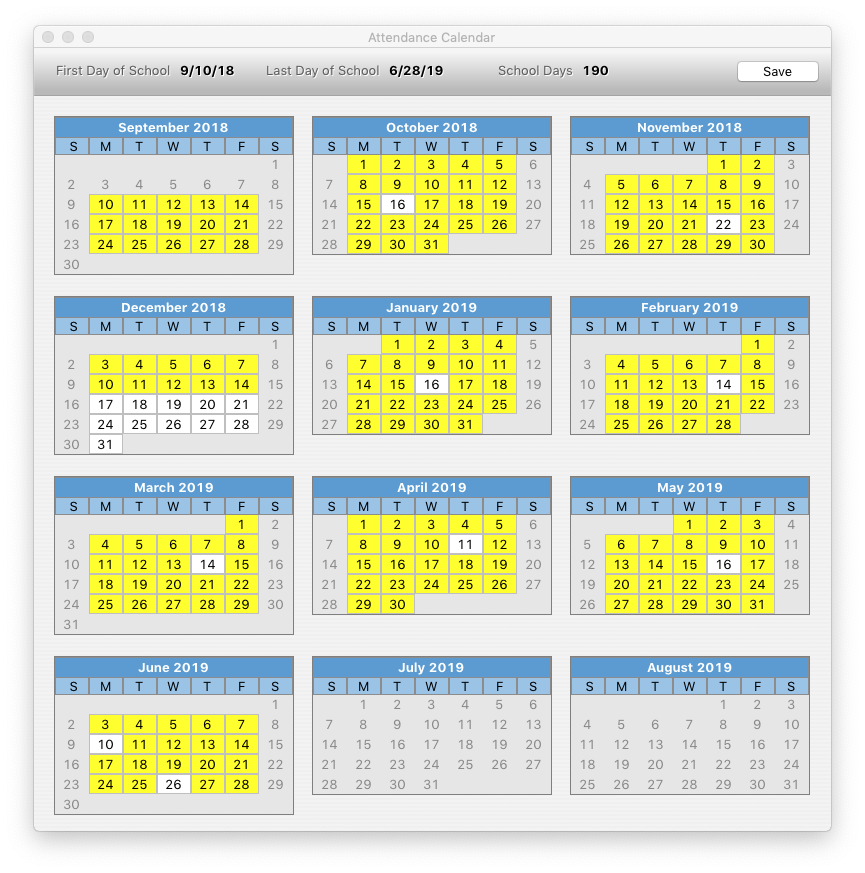
Use the Attendance Calendar to define which days are school days for the active school year.
SETTING FIRST AND LAST DAY OF SCHOOL
At the top of the screen, select the first day of school and the last day of school. The total number of days defined as school days will be displayed. Teachers can take attendance only on the days you mark as school days.
SELECTING NON-SCHOOL DAYS
Click a yellow day to change it to white - making it a non-school day, such as a holiday, break or other non-school day. Click a white day to change it from a non-school day, to a active school day.
Days displayed in yellow are school days. Days shown in white, are non school days.
The Student Attendance window allows you to view and set daily attendance in SIMON.
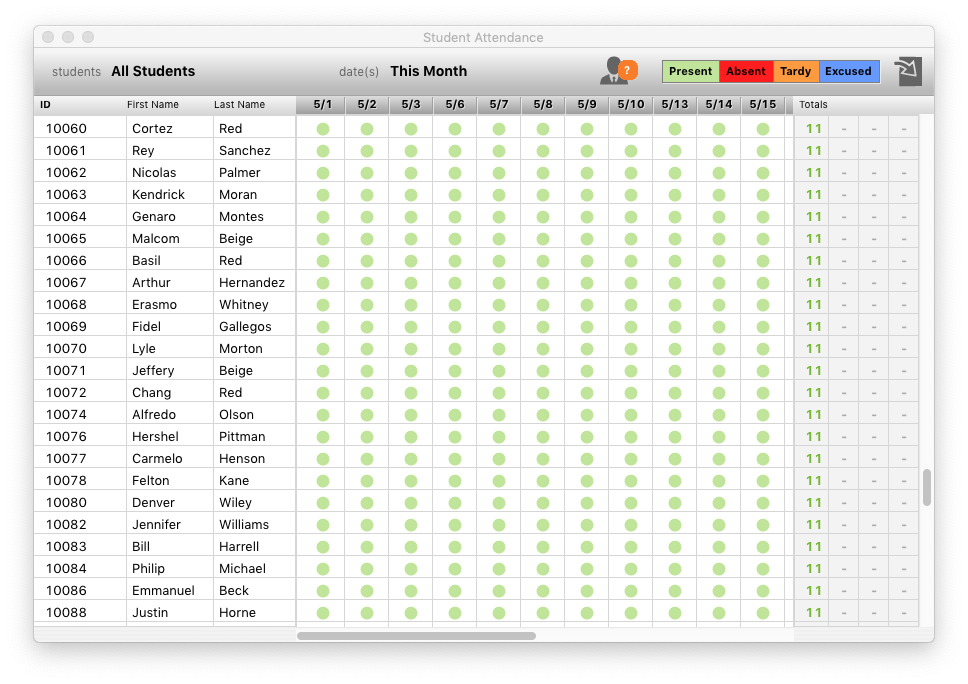
First, select the student(s) you want to view from the students popup menu. You can choose All Students, or select to view by:
The default view is All Students.
Date(s) to View
Next, select the date(s) you want to view. You can select:
The default view is Today.
Teacher Attendance
The teacher icon at the top of the window shows the number of teachers that have not posted their attendance for the selected day. Click this icon to show the list of teachers that have not posted attendance data. You can then have SIMON send each teacher an eMail to remind them to post their attendance.
Attendance Display Types
You can select the specific types of attendance you want to view. You can select to see students that have been marked:
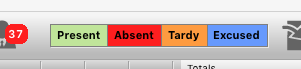
You can select one, all, or any combination of attendance types. Student that have a mark of the selected type(s) will be displayed. This is very useful if you want to get a list of all absent students for the day.
Setting Student Attendance
By default, each student is presumed present unless otherwise noted. To set a student's attendance, simply click on the colored dot for the student/date you want to change. You'll see a popup menu where you can select the desired attendance mark. There is also an option to set all students at once.
Student Attendance Totals
On the far right of the window is the Total columns. This is a group of four columns, one for each of the attendance types. These columns will show the total number of students that are present, absent, tardy and excused for the selected date range.
Export Attendance Data
You can export the currently displayed attendance data at anytime by clicking the Export button. All students, dates and data currently displayed will be exported to a tab-delimited text file. When you click the Export button, you can choose to include additional data in your export.
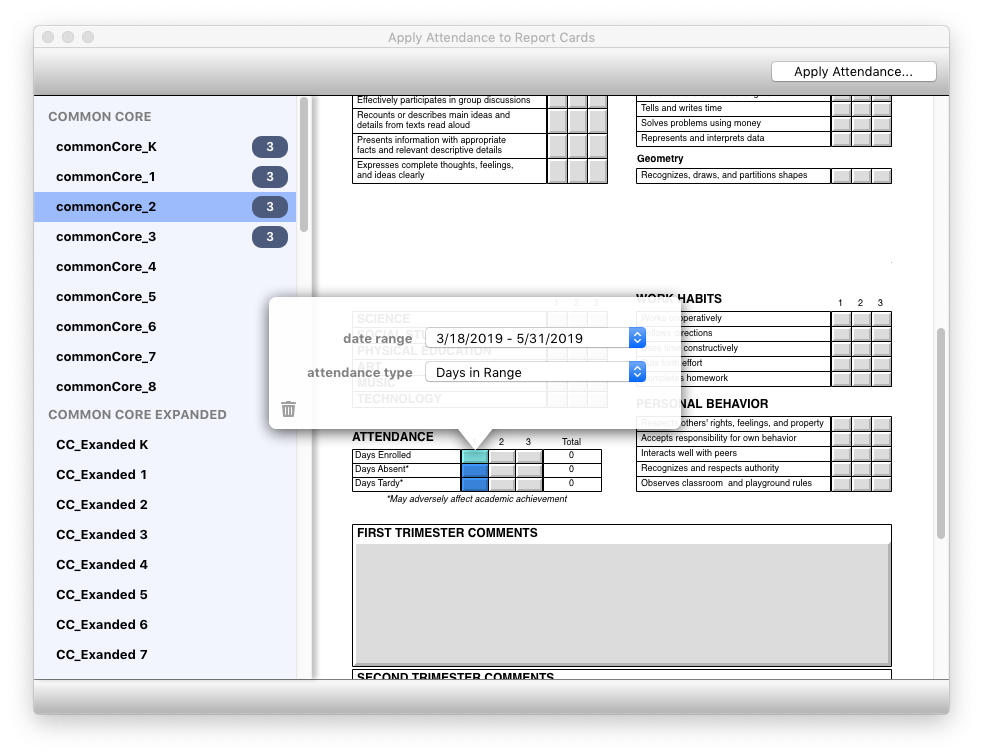
At the end of the grading period (or at anytime you want), you can apply the attendance totals to the report cards. This is accomplished by defining which area(s) on the report card should hold the attendance data, and setting the date range for that field.
Select the Report Card
Begin by selecting the report card from the list on the left where the attendance data should be placed.
Your school may have a different versions of the report card for each grade level. In this case, you may need to select each report card individually.
Select the Field
Next, click the field on the report card where the attendance data should be placed. When you click on a field, select the date range and attendance type for that field.
Selecting the Date Range
When you click a field, select the date range of the attendance data that should apply to this field. If this is your first time, or you don't see the date range you need, select New Date Range. A calendar will appear where you can select the starting date, then the ending date. Once you create a date range, it will remain as a choice in the date range popup menu.
In general, Date Ranges should be the same as your grading periods (trimesters, semesters, etc.)
To delete a date range, select Remove Date Range.
Selecting the Attendance Type
The Attendance Type defines which type of attendance data should be applied to the selected field. For example, if you are defining a "Days Absent" field, you would select Days Absent. For a Days in Term field, select Days in Range.
Applying the Attendance Data
When all areas of your report card(s) have been defined, click Apply Attendance. You will be asked which date range you want to apply. This selection allows you to only apply attendance data to the desired period or term.