- support@clearvisiontech.com
- (909) 484-2052


 District Documents
District Documents are simply static documents that you want your teachers to have access to. For example: Parents Rights, Explanation of the Standards, detailed description of the grading key, are all District Documents. They do not require any input from the teacher. They are designed to be printed only. These documents are available to RCM users by simply choosing the document from the District Documents option in the File menu in RCM. You have control over what documents are available to the RCM users.
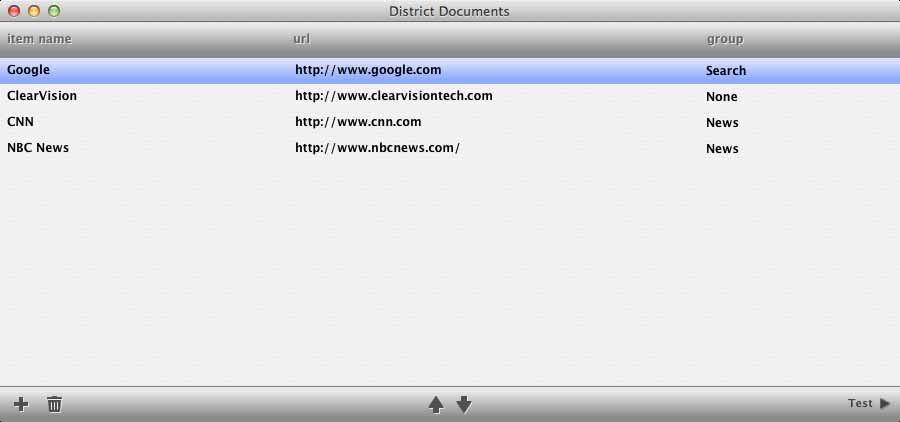
To begin, create your documents. PDF is the most common (and recommended) format. Then, post the documents to a server. Remember that teachers can access RCM from outside your firewall. So be sure to choose a location that can be accessed from anywhere.
LIST YOUR DOCUMENTS
Next click the  New button. A new item will be added to the list. In the Item Name column, enter the name of this document. This is the name that will appear in the District Documents option in the File menu in RCM. This name does NOT have to be the same as the physical file's name. Then, enter the url to the file in the URL column. This is the path to the file on your server. To test the path, click the Test button at the bottom-right corner of the window.
GROUP DOCUMENTS
Use the Group column to put your documents into groups. For example, you might want to group them together by grade level, or subjects. Groups will be presented as contextual menus in RCM. To preview the final groups, click the Test button at the bottom-right corner of the window.
To remove an item from the list, select the item in the list and click the  Delete button.
RCM will automatically alphabetize your documents, but you can rearrange the items in the list by using the Up and Down buttons.
When all items are set as desired, simply close the window to commit the changes.